In the TVPaint 11 User Manual under "Video Input" it says:
"This lesson is not yet available. If you have any questions regarding this lesson, don't hesitate to ask it on our forums. Thanks for your patience."

To grab video footage, you must first ensure your peripheral device (webcam with USB, or mini-dv firewire camera) is correctly installed. Then, you must right-click on the webcam icon button located on the bottom right-hand side of the project window or go to the menu
Windows > Animation > Video In Settings. This action opens the Video Input panel. ]

If your device is correctly connected to your computer, opening this window will show what is presently seen by the device in the preview window. You may need to first select your device as from the menu of available video input devices (this list will vary depending on how many video devices you have available . If you only have a single webcam enabled then that is the only device you will see).
Here is a view of the Video Input panel with the list of available video input devices. In this example the Logitech Webcam C930e 2 will be selected.

The Video Input panel settings:
* Device : you choose here which video input source you will use (very useful if you have several cameras or webcams connected ). The “Settings” button, just below will open the webcam’s settings if you are using TVPaint Standard Edition (32bits version) . In TVPaint Pro (64bits) this Settings button is not used.
------
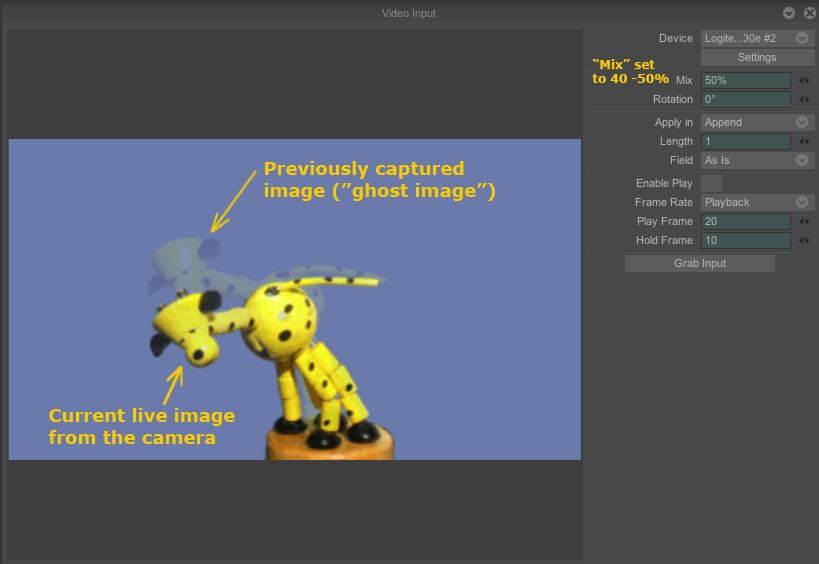
* Mix : the mix option is a little like a light table or “onion-skin” function (very useful if you make stop-motion movies). This option will allow you to see the previously captured image superimposed with the current live image from the webcam, to assist you in accurately gauging the spacing of the object or puppet you are animating .
 * Rotation
 : rotate the orientation of the captured image from 0°, 90°, 180° or 270°. (very useful if you want to use the video input to line-test an animation made on paper. Instead of turning your camera, rotate the image orientation with TVPaint .)
--------
* Apply in : you can choose where your grabbed image will go
- Append image : add a new image into the same layer
New layer : add a new layer with the grabbed image
Current image : replace the current image by the new grabbed one
* Length : here you can define how many exposures your grabbed image will be held for on the Timeline. By default it is “1” , which means each captured image will be held for 1 frame (
“ON 1’s”) , but if you change it to 2 then each captured image will be held for 2 frames (
“ON 2’s”) and so forth.
* Field : here you can manage the video fields during grabbing. -
- As is : no field (in most cases use this setting, As Is )
Lower first : only lower fields will appears
Upper first : only upper field will appears
Mix : the image will be composed of 50% higher fields and 50% lower field
-------
* Enable play : reads the entire clip (very useful for review of your progress if you're making a stop motion movie)
* Frame rate : choose here the preview frame rate
- Playback - reads the preview playback like the clip playback frame rate.
1/2 playback - reads the preview playback speed half of the clip playback
1/4” playback - reads the preview four times less than the clip playback
Project - reads the preview playback like the project's frame rate (the one you've chosen when you've created your project , for example : 24 FPS. )
1/2 project - read the preview half as the project frame rate
1/4 project - read the preview four times less as the project frame rate.
* Play frame : choose how many images you want to see when play the preview .
* Hold frame : choose how long will appear what your camera / webcam is filming (in FPS) after playing the preview.
--------
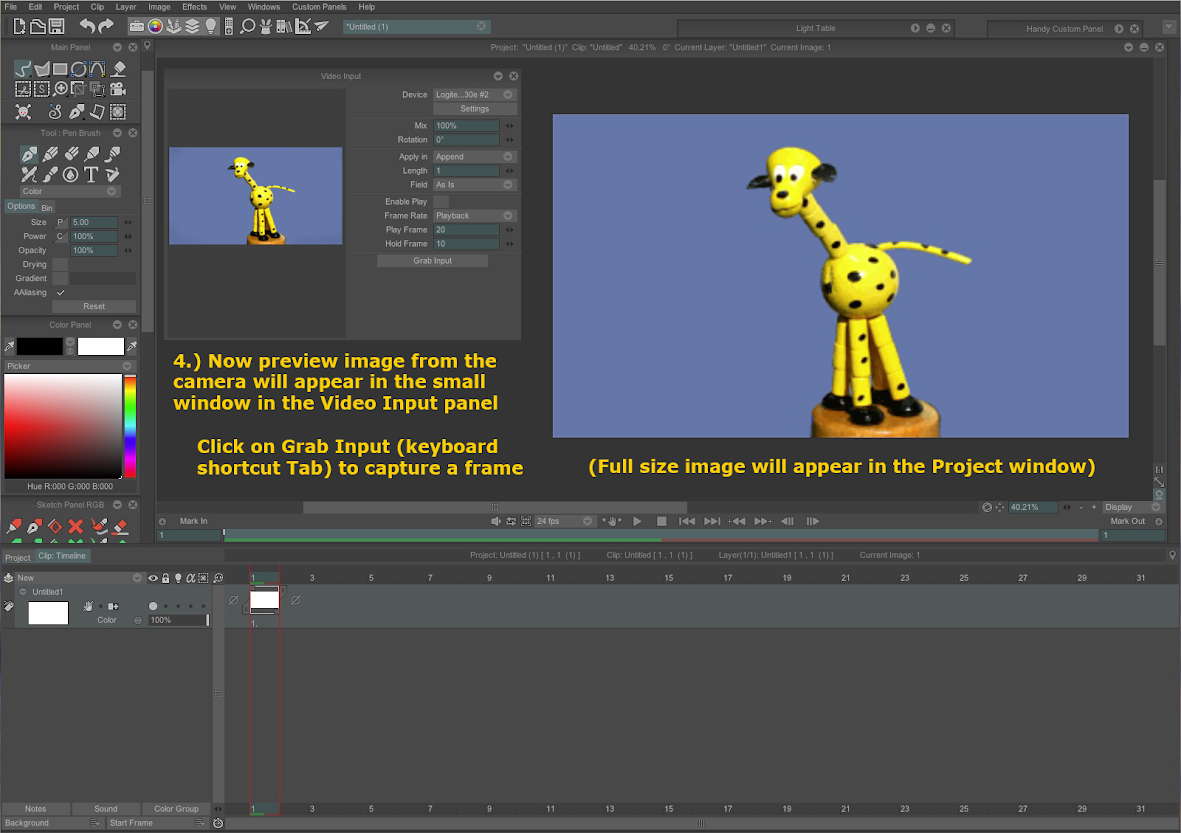
*Grab Input - this button will grab video input from the camera. You may also use the keyboard shortcut
Tab to execute the command to grab video input.
---------
These screen grabs review the procedure:


I didn't do any screen captures to show it , but notice the "motion blur" added to the fast actions of the giraffe puppet. That can be done with the blur tools in TVPaint after the animation is completed. (and I'm not sure , but I think the blinks on the giraffe puppet were also animated as overlays in TVPaint ?)
- TVPaint_stop-motion_giraffe.gif (181.86 KiB) Viewed 88272 times
For Stop-Motion video frame capture from a Webcam it is highly recommended to use the webcam properties to disable Auto-Focus (set to Manual Focus) and disable Auto-Exposure/Auto White Balance (to set the Exposure manually) to avoid flickering frames from the auto-exposure or auto-focus attempting to reset itself between frame captures. For
Windows users using one of the Logitech HD (C-930e, C-920, C-615) webcams or the Microsoft Lifecam Studio webcam this is variously known as "Logitech Webcam Settings" , "Webcam Properties" , "Driver Property Page" . Check the support page for your webcam.
For
Mac users the webcam control software
iGlasses is recommended , or a similar software called
Webcam Settings, which will allow the user a high degree of control in adjusting the image quality from the webcam (Logitech C-930e or Logitech C-920 recommended).
See this tutorial about using the webcam control software to adjust your camera settings:
Using HD Webcam Control Software .
-------
Capture drawings for a line test/pencil test -
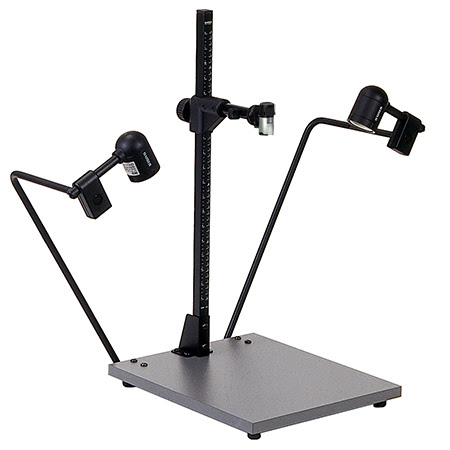
The same Video Input can be used to to capture drawings frame by frame instead of stop-motion puppets , so you can make a traditional animation line test/pencil test from your drawings. (this may also be done with a scanner , then importing the scans into TVPaint, but video capture is faster for making a quick pencil test.) It is advisable to mount the webcam on a copy stand or a tripod , pointing straight down at the drawings , which are registered with a peg bar taped down under the camera.
Something like this would be ideal to mount the webcam and a peg bar taped down below for capturing your drawings:

After capturing the drawings you should then run the
Scan Cleaner FX on the drawings to lighten or clean the drawings and to make them transparent , so you can see-through the captured layers to a Background layer underneath .